Email Setup Guide
- Outlook 2000 for the PC - POP3
Last modified: October 13 2005 11:39 am
This guide is intended for users running Microsoft Outlook 2000 in Internet Mode only. Please refer to steps 1 and 2 for further details.
[  Print Page ]
| To begin open Outlook 2000 | |||||
|
| |||||
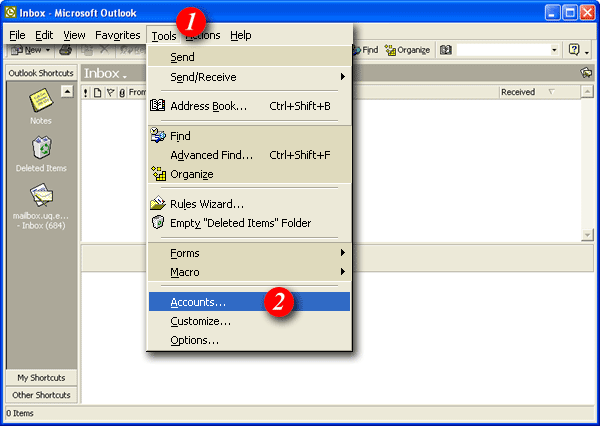 | |||||
| 1)Click the 'Tools' menu. | |||||
| 2)Select 'Accounts'. (Note: if you see 'Services' instead of accounts, Outlook 2000 is running in Corporate mode and you should not continue with this guide. Please return to the main page and select the Outlook 2000 Corporate mode guide). | |||||
|
| |||||
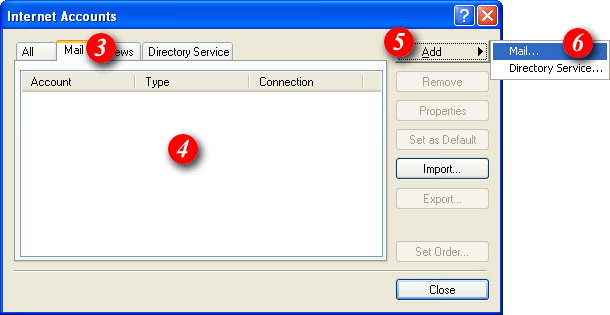 | |||||
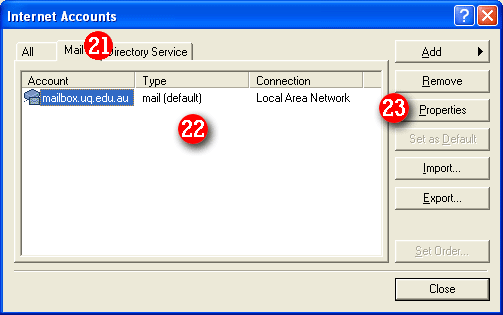
| 3)Select the 'Mail' tab. | |||||
| 4)In the middle of the screen you will see a list of accounts that have already been setup in Outlook 2000. | |||||
| 5)Click the [Add] button. | |||||
| 6)Select 'Mail' from the menu. | |||||
|
| |||||
| |||||
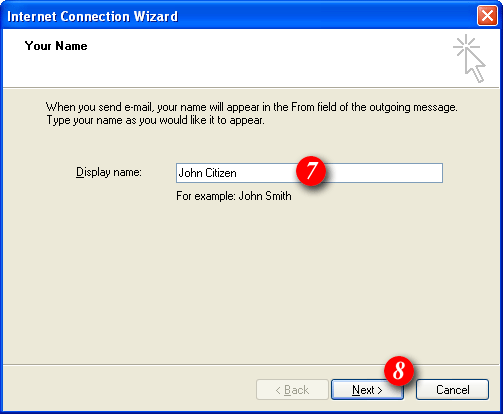
| 7)Enter your name as you would like it to appear in outgoing mail. | |||||
| 8)Click [Next] to continue. | |||||
|
| |||||
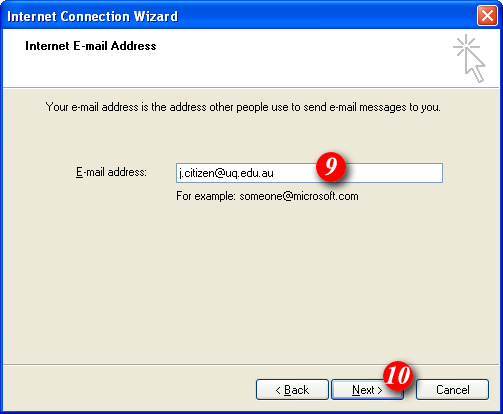 | |||||
| 9)Enter your email address. If your unsure of your email address please contact Imageway (see the Imageway contact page for deatils). | |||||
| 10)Click [Next] to continue. | |||||
|
| |||||
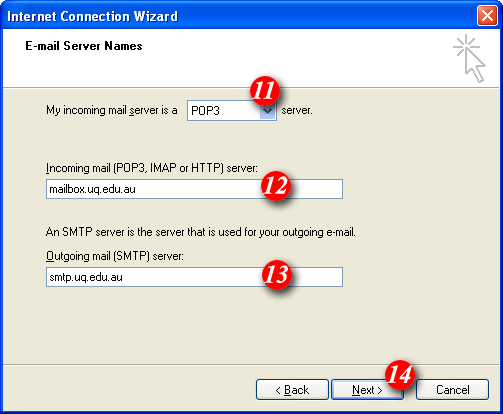 | |||||
| 11)'My incoming mail server is a .. ' should be set to POP3 (default setting). | |||||
| 12)Enter 'mail.imageway.com' as the incoming mail server name. | |||||
| 13)Enter 'smtp.imageway.com' as the outgoing mail server name. | |||||
| 14)Click [Next] to continue. | |||||
|
| |||||
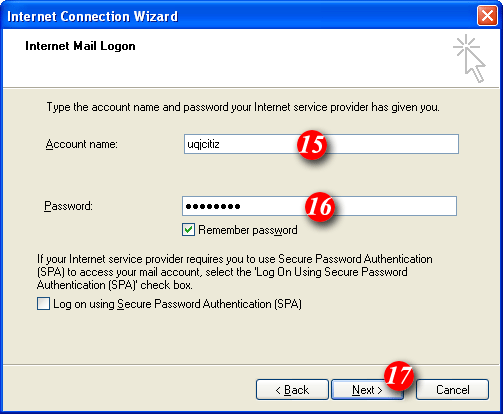 | |||||
| 15)By default Outlook 2000 will enter part of your email address as the username. Delete this information and enter your 'email address' (for example: me@mydomain.com). | |||||
| 16)Enter your password. The 'Remember password' tick box is optional. | |||||
| |||||
| 17)Click [Next] to continue. | |||||
|
| |||||
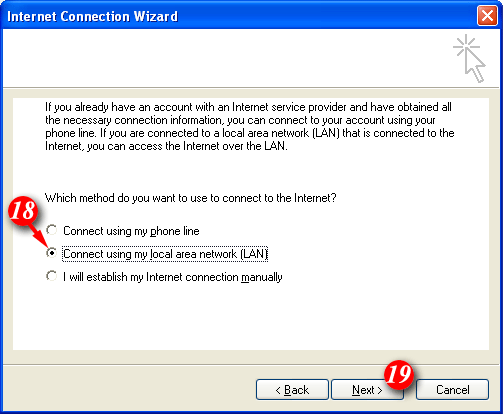 | |||||
| 18)Select the 'Connect using my local area network (LAN)' option. It's advisable to select this option even if you connect to the Internet using a dialup connection. | |||||
| 19)Click [Next] to continue. | |||||
|
| |||||
| |||||
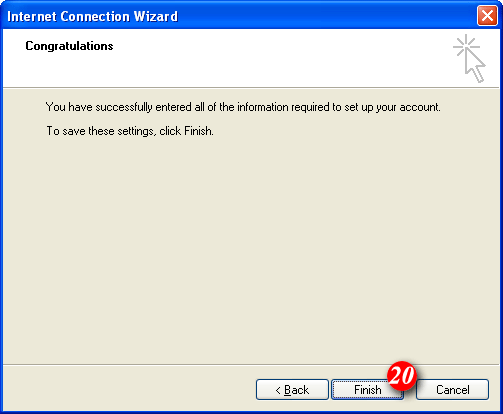
| 21)Click [Finish] to continue. | |||||
|
| |||||
 |
|||||
|
|||||
 |
|||||
|
|||||
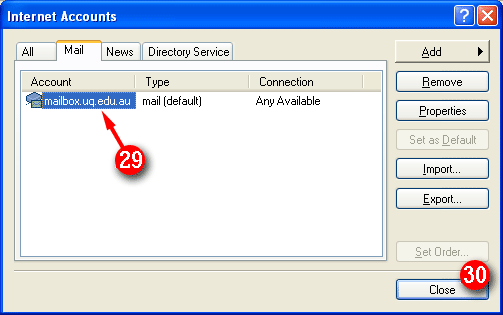 | |||||
| 29)The mail account you have created will be displayed as 'mail.imageway.com'. | |||||
| 30)Click [Close] to finish. |