Entourage Setup
Guide - Managing your mail on Macintosh OSX
Last modified: October 13 2005 11:39 am
[  Print Page ]
| 1)Open Entourage |
|
|
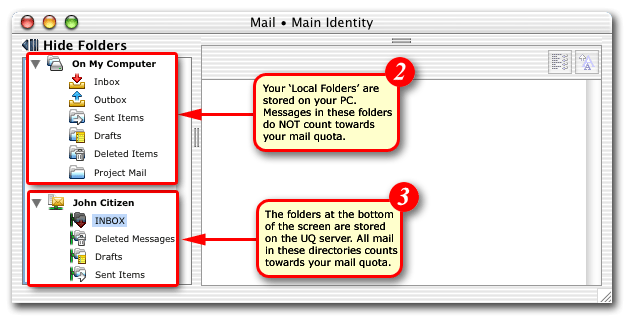 |
| 2)Examine the Folder List at the top-left of the screen. Your 'Local Folders', as their name would suggest, are stored locally on your PC. (Messages in your local folders do NOT count towards your mail quota) |
| 3)The folders at the bottom-left contain all your server-based mail. Messages in these folders contribute to your mail quota. As you have a fixed amount of space on the server it is important to monitor the amount of mail in these directories to ensure your account does not go.'Over Quota'. A go.d rule of thumb is to move any messages that are more than a month old to your local folders group. For assistance transferring mail please read below |
|
|
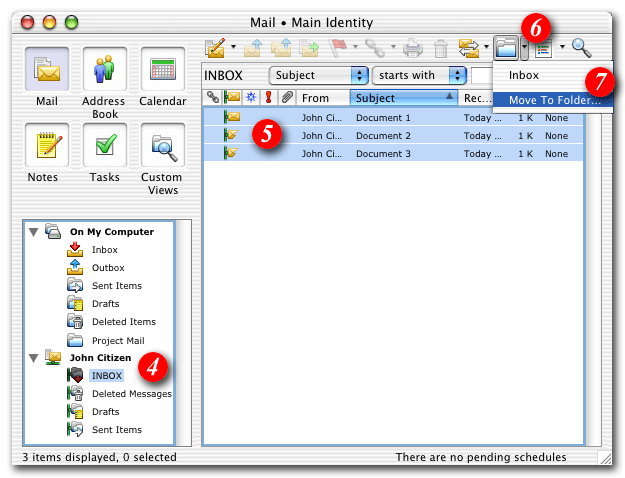 |
| 4)Open your server-based 'Inbox' so you can see your messages |
| 5)Select the messages you would like to move to your local folders |
| 6)Click the 'Move' icon
|
| 7)Select 'Move to Folder...' |
|
|
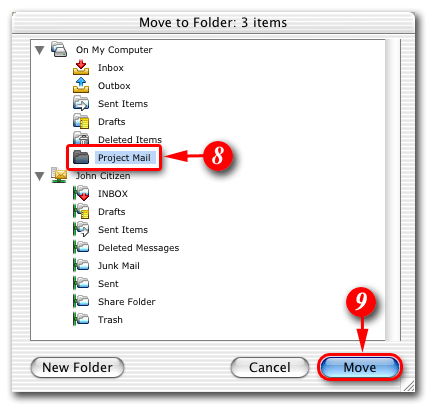 |
| 8)Select the appropriate folder in your 'Local Folders' group |
| 9)Click the [Move] button |
|
|
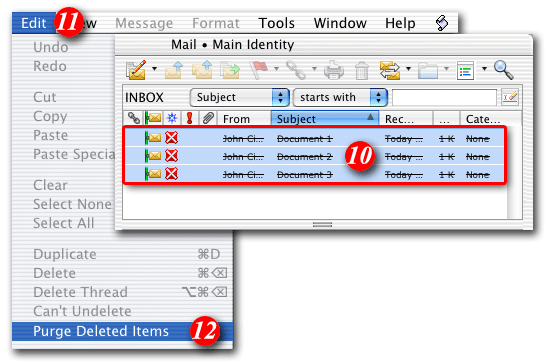 |
| 10)Any mail moved from your Inbox will have it's status changed to 'Deleted', but will not disappear from your Inbox until it has been purged. Deleted messages that are waiting to be purged, appear as above, with a line through them |
| 11)Open the 'Edit' menu |
| 12)Select 'Purge Deleted Items' - all mail in a status of 'Deleted' will be removed from your Inbox |
|
|
Creating Sub-Folders |
 |
| To help you to manage your mail quota you may find it useful to create a number of sub- folders within your local folders area. To create a new sub-folder: |
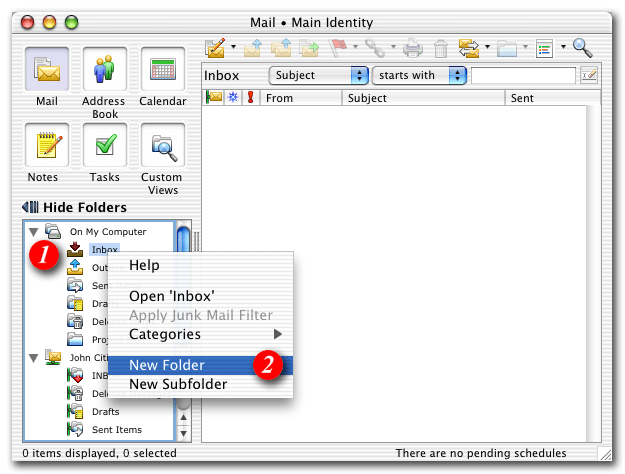
| 1)Hold down the [Control] key and click a directory in your local folders area |
| 2)Select 'New Folder' and |
|
|
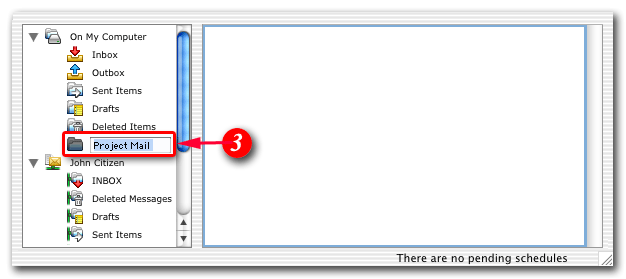 |
| 3)Enter a name for the new directory in the folder list on the left of the screen |
|
|