| To begin open | ||
|
| ||
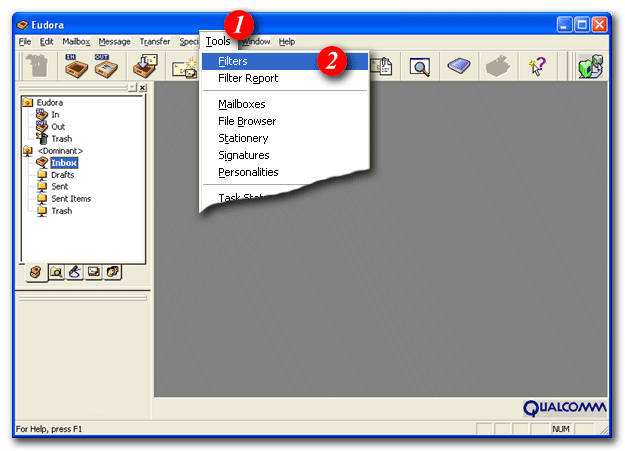 | ||
| 1)From the menu bar, click on 'Tools' | ||
| 2)Select 'Filters' from the drop list | ||
|
| ||
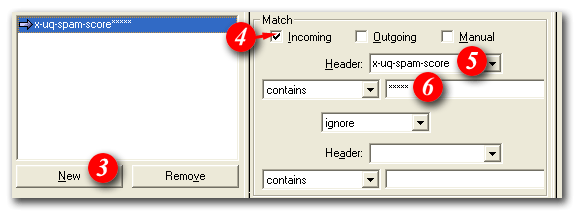 | ||
| 3)Click the [New] button | ||
| 4)Make sure there is a tick in the 'Incoming' checkbox, and all other checkboxes should be unticked | ||
| 5)Type in 'X-SpamDetect' | ||
| 6)Type in '****' | ||
|
| ||
| ||
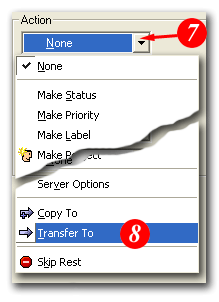
| 7)Under the 'Action' heading, click the [Arrow] | ||
| 8)Select 'Transfer To' from the drop list | ||
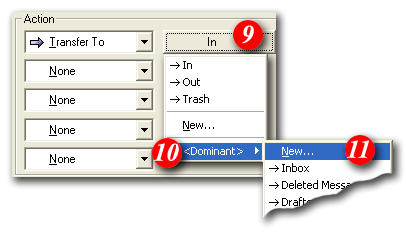
| 9)Click the [In] button | ||
| 10)Highlight 'Dominant' | ||
| 11)Select 'New...' from the list | ||
|
| ||
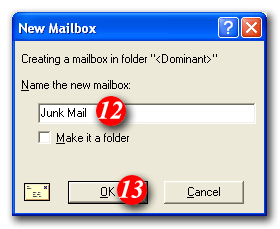 | ||
| 12)Enter a name i.e. Junk Mail | ||
| 13)Click the [OK] button to continue | ||
|
| ||
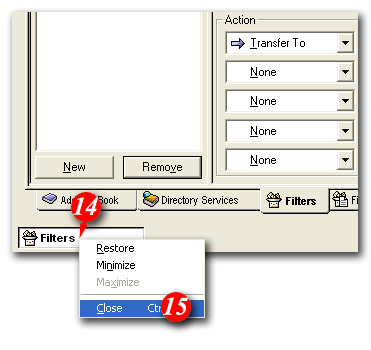 | ||
| 14)Right-click on the [Filters] | ||
| 15)Select 'Close' from the drop list | ||
|
| ||
 | ||
| 16)A message box will come up asking you to save, click the [Yes] button |
The spam filter by default defines anything with a "spam score" of 4 or more as probably spam. You can personalise the filtering rules to be more or less restrictive by increasing or decreasing the number of asterisks after 'X-SpamDetect:'
For example, if you wanted to consider anything with a score of 3 or more to be spam, the rule would look like: 'X-SpamDetect: ***'. Decreasing the number of asterisks will result in classifying more e-mails as spam. You may need to check your spam folder more carefully for non-spam e-mails that might have been classified as spam. If you wanted to rate anything with a score of 8 or greater as spam, the rule would look like: 'X-SpamDetect: ********'. Increasing the number of asterisks may result in fewer filtered e-mails being classified as spam and more potential spam staying in your Inbox.